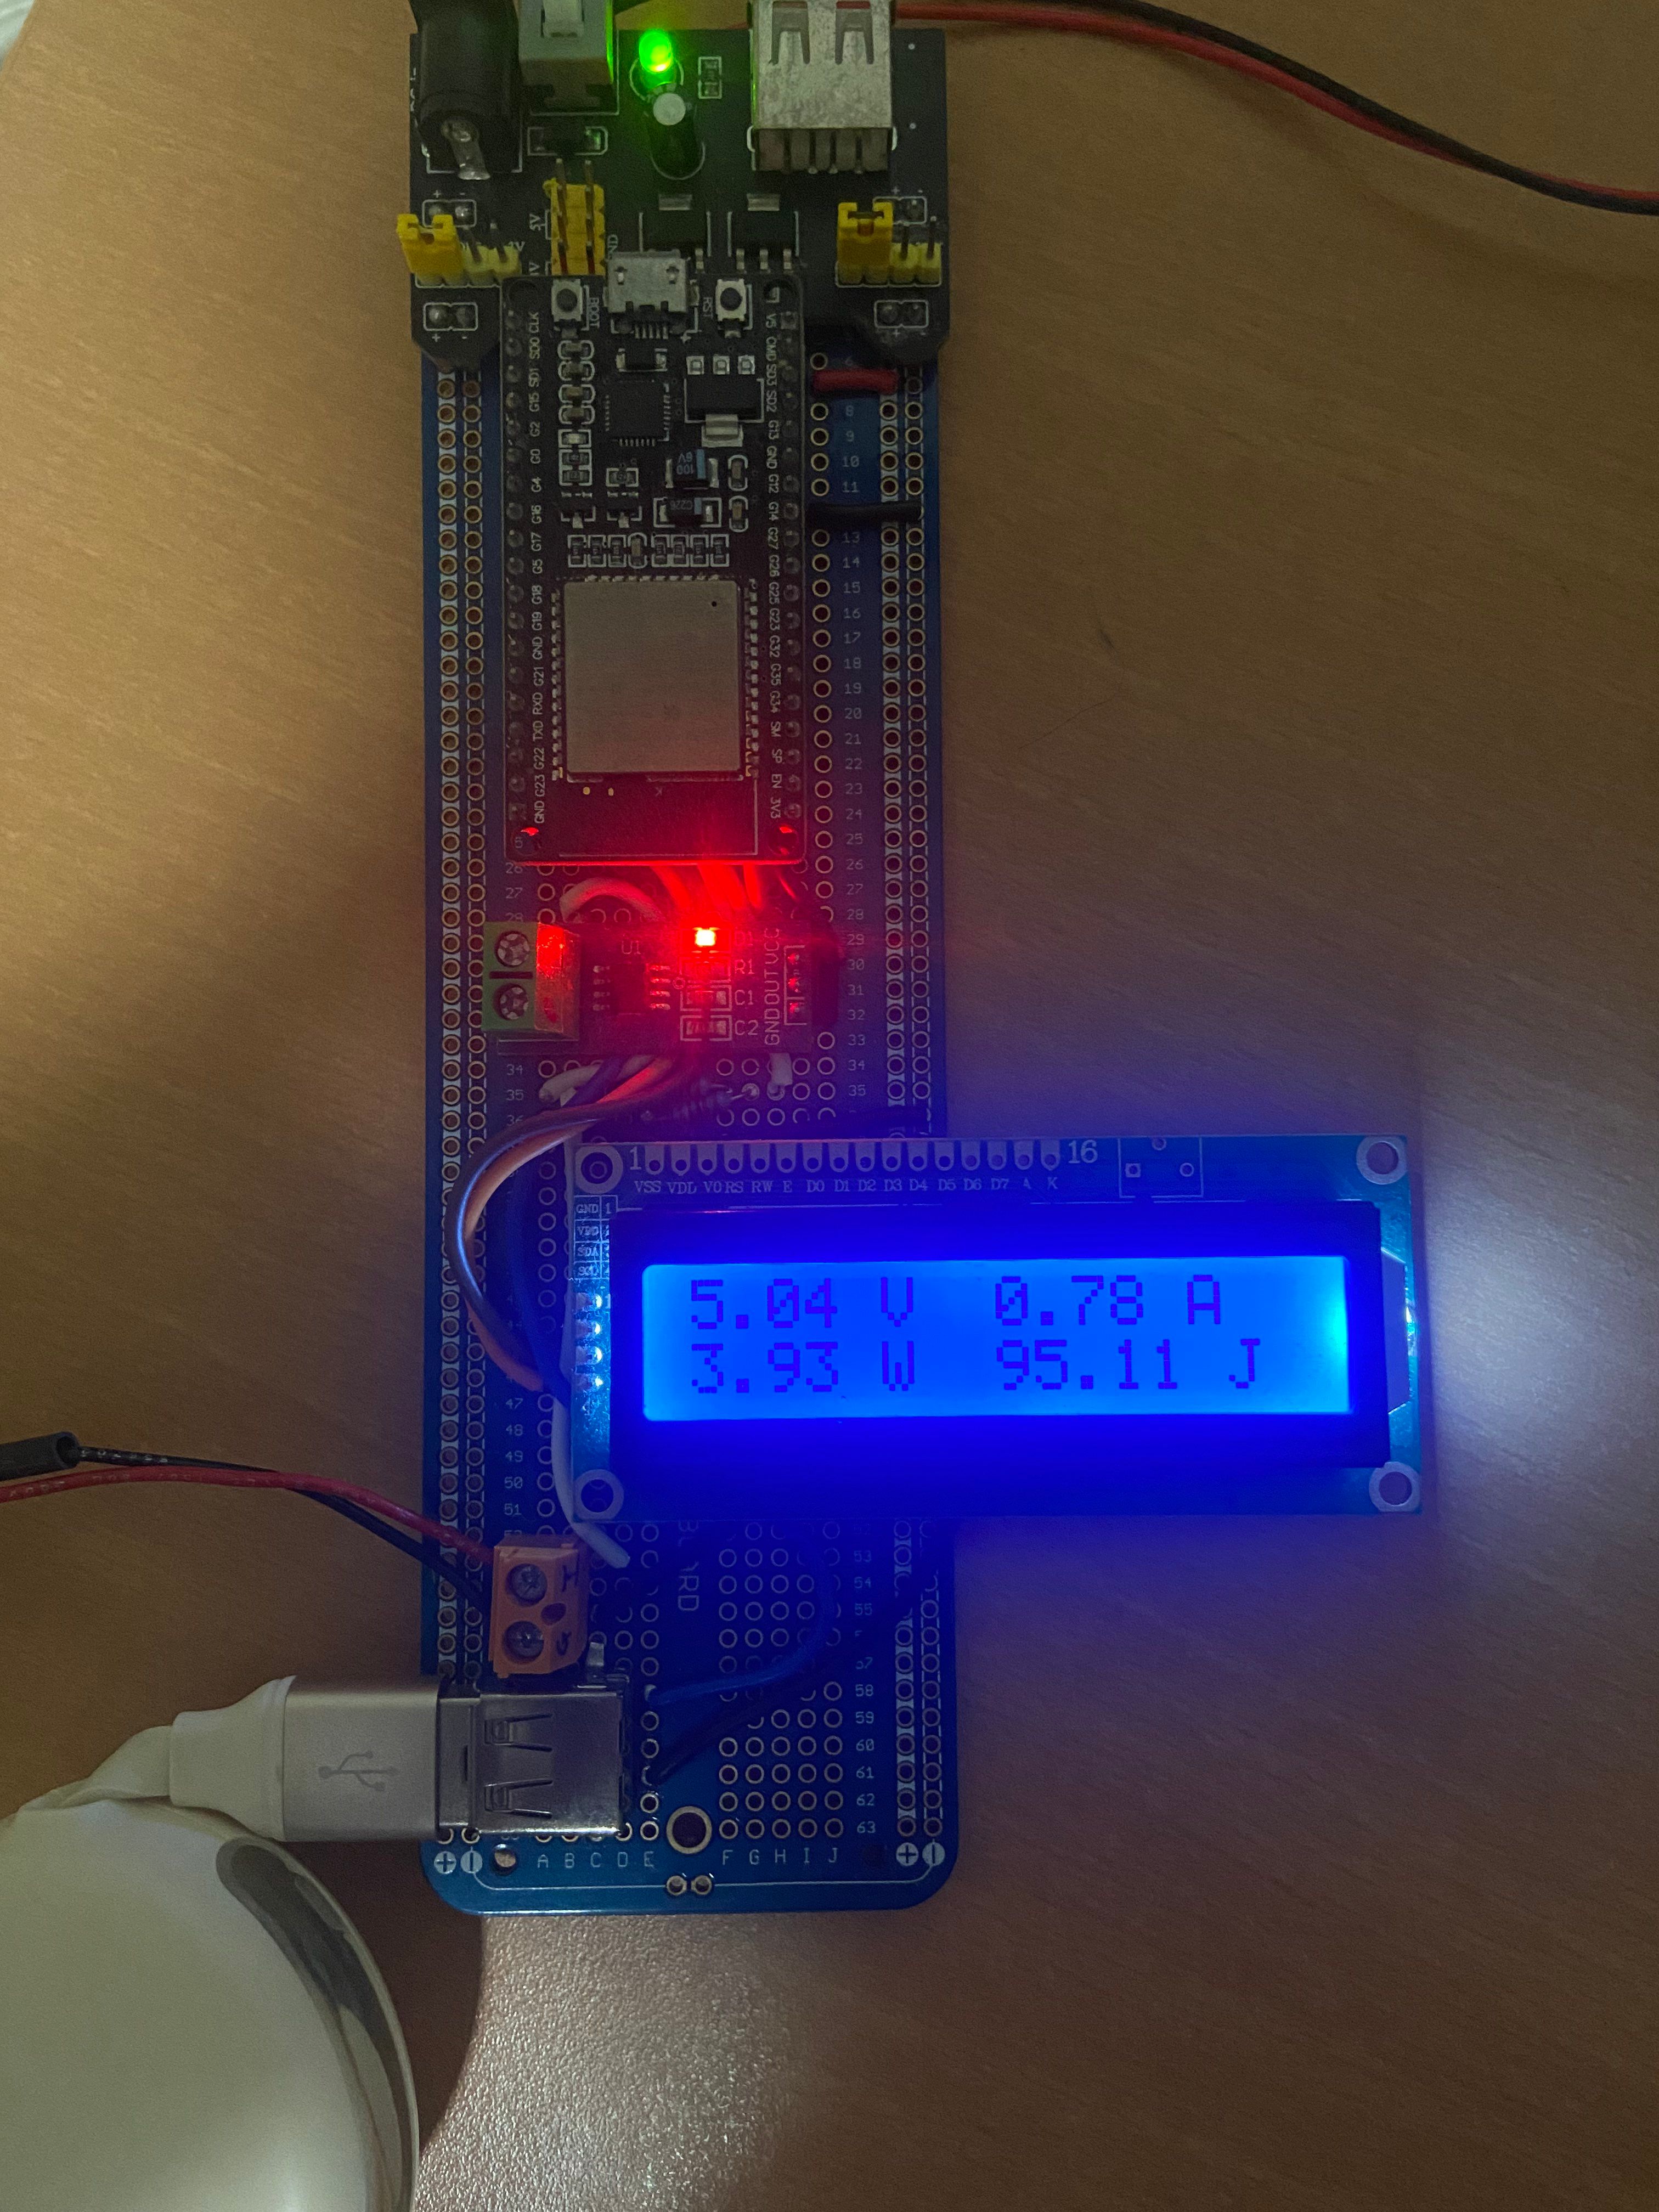
Power Meter
Project Description
I made this power meter during my university group project for DESN2000 where I needed a way to validate the amount of energy generated by our backpack.
Technologies Used
#ESP-32#C#Electronics#Soldering
Process
I only wanted to use what I already had on hand at the time which was:
- ESP32
- LCD display
- 2KΩ resistors
- ACS712 5A current sensor
After accounting for the required resources, this was the schematic that I ended up with.

And after assembly, this is what it looks like.

I then wrote the following code for the ESP-32 to interpert the sensor readings and output it to the LCD display.
#include <LiquidCrystal_I2C.h>
#define READINGS_LEN 64
#define DELTA_TIME 6
double CURRENT_CALIBRATION_OFFSET = 0.0;
double VOLTAGE_CALIBRATION_OFFSET = 0.0;
double* currentReadings = new double[READINGS_LEN]();
double* voltageReadings = new double[READINGS_LEN]();
double joules = 0;
LiquidCrystal_I2C lcd(0x27, 16, 2);  // I2C address 0x27, 16 column and 2 rows
unsigned long lastLcdRefresh = 100000000;

// Average of an array
double average(double array[], int len) {
  double sum = 0.0;
  for (int i = 0; i < len; i++)
    sum += array[i];
  return sum / len;
}

// Shifts the array right
void shift_right(double array[], int len) {
  for (int i = len - 1; i > 0; i--) {
    array[i] = array[i - 1];
  }
  array[0] = 0.0;
}

void calibrate() {
  const int totalCalibrationCycles = 120;
  double totalVoltageDiff = 0.0;
  double totalCurrentDiff = 0.0;
  lcd.clear();
  lcd.setCursor(0, 0);
  for (int i = 0; i < totalCalibrationCycles; i++) {
    int adc = analogRead(34);
    double loadVoltage = analogRead(35) * 3.3 / 4095.0 * 2.0;
    double sensorVoltage = adc * 3.3 / 4095.0;
    double current = (sensorVoltage - 4.92 / 2.0) / 0.185;
    // No voltage and current at the start.
    double voltageDiff = 0 - loadVoltage;
    double currentDiff = 0 - current;
    // Add difference to the calibration results
    totalVoltageDiff += voltageDiff;
    totalCurrentDiff += currentDiff;
    // Display calibration status to lcd
    lcd.setCursor(0, 0);
    lcd.print("Calib..");
    lcd.setCursor(8, 0);
    lcd.print("i: ");
    lcd.print(i);
    lcd.setCursor(0, 1);
    lcd.print("V: ");
    lcd.print(totalVoltageDiff / (double)i);
    lcd.setCursor(8, 1);
    lcd.print("A: ");
    lcd.print(totalCurrentDiff / (double)i);
    delay(6);
  }
  // Update calibration offsets
  VOLTAGE_CALIBRATION_OFFSET = totalVoltageDiff / totalCalibrationCycles;
  CURRENT_CALIBRATION_OFFSET = totalCurrentDiff / totalCalibrationCycles;
}

void setup() {
  lcd.init();  // initialize the lcd
  lcd.backlight();
  calibrate();
}
void loop() {
  // Obtain input
  int adc = analogRead(34);
  double loadVoltage = analogRead(35) * 3.3 / 4095.0 * 2.0 + VOLTAGE_CALIBRATION_OFFSET;
  if (loadVoltage < VOLTAGE_CALIBRATION_OFFSET + 0.05) loadVoltage = 0;
  double sensorVoltage = adc * 3.3 / 4095.0;
  double current = (sensorVoltage - 4.92 / 2.0) / 0.185 + CURRENT_CALIBRATION_OFFSET;
  if (current < 0.05) current = 0;
  // Calculate average current
  double averagedCurrent = average(currentReadings, READINGS_LEN);
  shift_right(currentReadings, READINGS_LEN);
  currentReadings[0] = current;
  if (averagedCurrent < 0.035) averagedCurrent = 0;
  // Calculate average voltage
  double averagedVoltage = average(voltageReadings, READINGS_LEN);
  shift_right(voltageReadings, READINGS_LEN);
  voltageReadings[0] = loadVoltage;
  // Calculate total energy generated
  joules += averagedVoltage * averagedCurrent * DELTA_TIME / 1000.0;
  // Display to LCD
  if (lastLcdRefresh > 500) {
    lcd.clear();
    lcd.setCursor(0, 0);
    lcd.print(averagedVoltage);
    lcd.print(" V");
    lcd.setCursor(8, 0);
    lcd.print(averagedCurrent);
    lcd.print(" A");
    lcd.setCursor(0, 1);
    lcd.print(averagedCurrent * averagedVoltage);
    lcd.print(" W");
    lcd.setCursor(8, 1);
    lcd.print(joules);
    lcd.print(" J");
    lastLcdRefresh = 0;
  }
  lastLcdRefresh += DELTA_TIME;
  delay(DELTA_TIME);
}
Results
The result was a fully functioning power meter that was suitable for the degree of accuracy that I required. Below is an image of the meter in action when charging an iPhone.
